This month’s challenge is brought to us by Karen of Bake My Day and Zorra of 1x umruehren bitte aka Kochtopf. They have chosen Tuiles from The Chocolate Book by Angélique Schmeink and Nougatine and Chocolate Tuiles from Michel Roux.

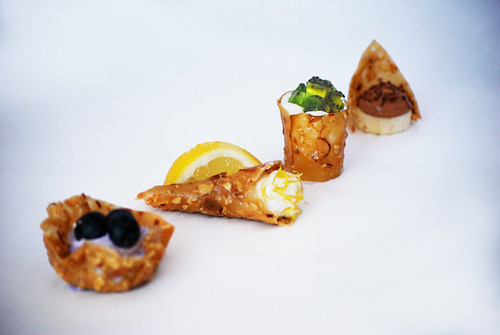
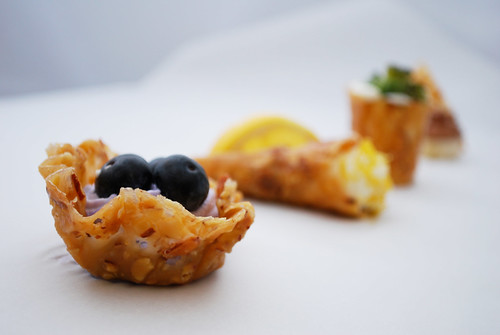

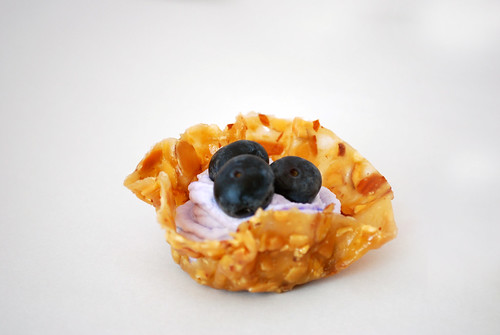
I was SO excited to create these yummy little tuile treats for my very first Daring Baker’s Challenge! It was a super fun challenge, and created a HUGE mess in my kitchen, and burnt my finger really super bad on the sugar, but well worth it at the end of the day. I’m a couple days late in posting this, because work was caarrrrrrrrazy this week….but I finally got to it, and hope you all enjoy it. Please find the recipe for the Nougatine Tuiles below.
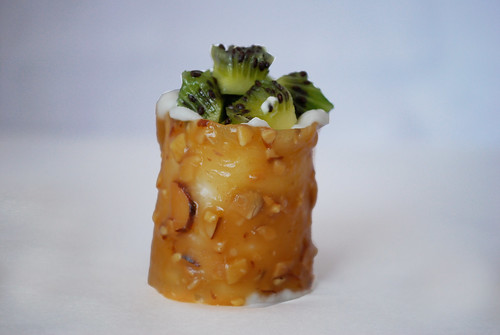
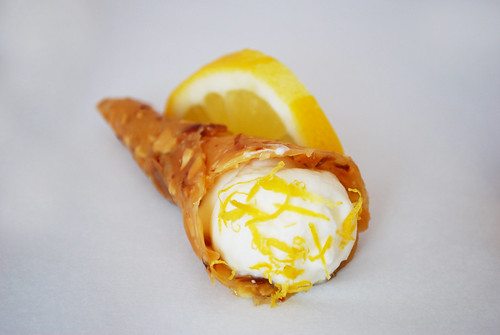
I made four different “shapes” for my tuiles…and accompanied them with four slightly different variations on a theme. I did a flavored mousse for each shape. The little cup was filled with a blueberry mousse, and topped with fresh blueberries…MMMmmm! The cone shape was filled with a lemon mousse, and topped with some fresh lemon zest, and garnished with a slice of lemon. The circle ring shape was filled with a white chocolate mousse and topped with some fresh diced kiwi. And finally, the little triangle tuile was accompanied by a slice of banana, topped with a chocolate mousse and some bittersweet chocolate shavings. YUM! YUM!
Nougatine:
From Michel Roux: Finest Desserts
5.1/4 cups / 500 grams sliced almonds
(or 4.1/3 cups/500 grams slivered almonds)
3.1/3 cups / 660 grams sugar
4 tbs / 60 grams butter (optional)
2 tbs oil (vegetable, sunflower, peanut)
Makes 2.3/4 lbs/1.2 kgs! (This is the yield of the recipe given in the book, feel free to downsize!)
Preparation time: 25 minutes
Preheat oven: 180C/350F
Spread the almonds on a baking sheet and toast in the oven until lightly browned. Cook the sugar in a heavy based saucepan over low heat, stirring gently and continuously with a spatula, until it melts to a light golden caramel. Add the almonds and stir over low heat for 1 minute, then stir in the butter until completely absorbed. (This is not essential, but will give the nougat an added sheen) Pour the nougatine onto an oiled baking sheet.
Shaping: place a bakingsheet toward the front of the warm oven, leaving the door half open. The warmth will keep the cookies malleable. Work with one piece at a time, of a size appropriate to the shape you want. Roll out each piece on a warm, lightly oiled baking sheet or lightly oiled marbled surface. It is essential to work quickly, since the nougatine rapidly becomes brittle. Heat the nougatine in a microwave oven for a few seconds only to soften it if needed.
Roll the nougatine into the appropriate thickness for your desired shape, but never thicker than 1/8 inch or 3 mm. Quickly cut out your chosen shapes using cookie cutters, or the blade or heel of a chef’s knife. To mold the nougatine, drape it very rapidly over the mold so that it follows the shape and contours. Leave until completely cold before removing from the mold.
Or, cut out and using your fingers or a knife, push into folds or pleats… use as a basket, twirl round a knitting needle..
Nougatine based shapes can be made two or three days in advance, Keep them in a very dry place and do not fill with something like a mousse more than 2 hours prior to serving.

Thanks so much to Lisa and Ivonne over at the Daring Bakers for giving me such a cool and fun opportunity to join the ranks! 🙂
February 1st, 2009

Well, it must be officially summer. I’ve baked my first strawberry rhubarb pies of the season. This is an old photo, taken with an old camera phone a long time ago. I was just too tired to photograph some new ones last night, but you get the idea. Maybe next time I bake some them, I will take some better photos and replace this one.
Anyway, sometimes I just crave the rhubarb. It reminds me of my Aunt Fran and Grama Dee. They used to have it growing in their backyard in Detroit, and I remember having plenty of rhubarb desserts as a little girl. As I was strolling through the grocery store last night, I spotted these very fresh and perfect stalks of rhubarb, and knew what must be done. Especially when I saw some super sweet strawberries a little ways down the aisle. There’s nothing like a little late-night baking for me to conjure up memories of my childhood. I was just in the mood to spend a little time thinking of my Aunt and Grandma last night. So here’s to you girls! And here’s to summer! Hooray!
Strawberry Rhubarb Pie
Recipe from Julie Foxworthy
INGREDIENTS FOR CRUST (makes two crusts)
2 1/2 cups unbleached all purpose white flour
1/4 teaspoon salt, any variety. (I prefer sea salt or kosher salt)
1 tablespoon white sugar
1 cup (16 tablespoons) very cold unsalted butter or shortening, cut into cubes. Just cut the stick once lengthwise, then four or five times across to make about ten chunks. You can also use half butter, half shortening if you like.
Approximately 8 tablespoons ice water. This water must be very cold: put some ice cubes in a bowl or measuring cup of water to keep it cold.
INGREDIENTS FOR PIE
2 – 2 1/2 cups diced fresh rhubarb
2 – 2 1/2 cups sliced fresh strawberries
1 – 1 1/4 cup sugar (depending on sweetness of strawberries you can add a little less)
1/3 cup flour
cinnamon to taste
1 egg (for egg wash for top of pie crust)
RECIPE INSTRUCTIONS FOR CRUST:
I have used this recipe with much success, so I’m passing along to you. Of course I was lazy last night, and just used the refrigerated pillsbury pie crusts. 🙂
RECIPE INSTRUCTIONS FOR FILLING:
- Combine diced rhubarb, sliced strawberries, sugar, flour, and cinnamon in a large mixing bowl until all the fruit is coated
- Pour mixture into unbaked pie shells
- Cover pies with 2nd layer of dough
- Seal edges around the pie, pinch with thumbs to make pretty pattern along the edges, or use a fork to seal
- Cut in some venting slices on the top of the pie
- Whisk egg in small bowl until slightly frothy, and brush on top of pie.
- Sprinkle top of pie with a little sugar
- Bake at 400 degrees for 40 minutes. Depending on your oven, if crusts become too dark, turn heat down to 375º halfway thru baking
Do not refrigerate fruit pies. Also, you have to let them completely cool before covering them with any kind of foil/plastic wrap, or else the top of the pies will become soggy.
Happy Summer, Enjoy!
January 16th, 2009
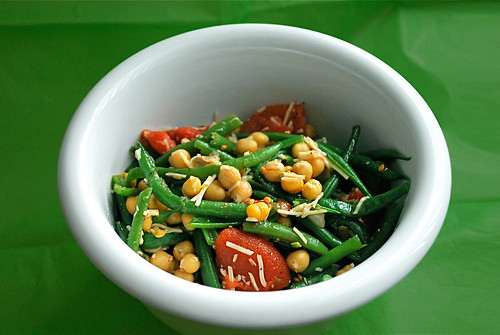
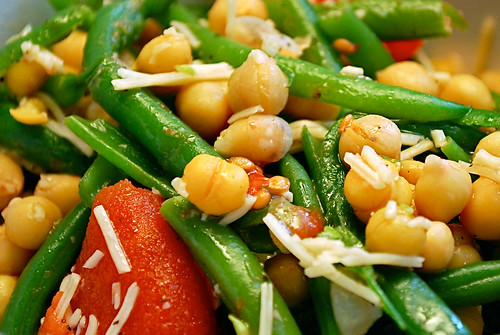
I don’t have a lot of time for cooking today (which is usually my Sunday pastime). So I decided to just whip up a quick, healthy salad for lunch. I love how colorful this salad is, and how fresh everything tastes.
Green Bean and Chick Pea Salad
Recipe from Julie Foxworthy
INGREDIENTS
About 4-5 cups of handtrimmed french green beans (haricot vert), steamed but still slightly crisp, you do NOT want mushy beans! YUCK!
1 can chick peas, rinsed and drained
1 can whole plum tomatoes, cut into quarters (minus liquid)
1/4 cup fresh grated parmesan cheese
2 tablespoons olive oil
1 tsp salt (more or less to taste)
1 tsp pepper (more or less to taste)
RECIPE INSTRUCTIONS:
- Steam green beans, until tender, but still maintaining a bit of the snap/crunch
- Once green beans are done cooking, drain and pour them into a bowl of ice water to shock and stop the cooking
- Place green beans into appropriate size serving bowl and add chickpeas, tomatoes, olive oil, parmesan cheese, salt and pepper
- Toss lightly with tongs, so everything is combined
- Adjust seasonings if necessary
- Serve with a squeeze of lemon and toasted pita points
- Enjoy!
January 5th, 2009
Since I’ve pretty much been laid up for the last three weeks, I unfortunately didn’t have the energy to do any of my holiday baking that I love to do which has been a huge bummer for me.
But this morning, I finally felt well enough to try my hand at a recipe I spotted on tastespotting. It’s actually a recipe that is adapted by Fanny from a Nigella Lawson recipe.
I baked the cakes per Fanny’s recipe from the link above, with one change. Since we don’t have true double cream (the kind you find in the UK) here in the U.S. I did a little digging and found this recipe from Emily Luchetti at the Washington Post.
I made a batch of this, and substituted it for the double cream called for in the cake recipe. Well, I think it came out delicious! I had a ton of the fake double cream left over, so I decided to get a little creative.
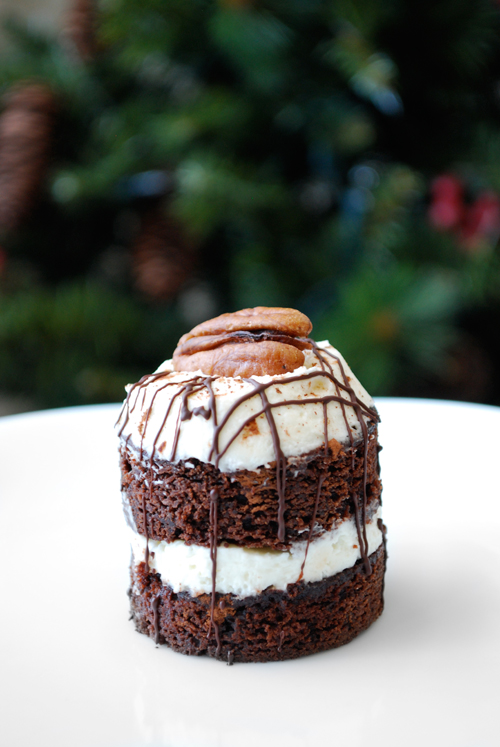
The result is the tiny little cake above!
I cut the loaf cake in half (it’s not very high to begin with, but very dense) mmmmm! Then I cut out little circles with some bisquit cutters. I layered the chocolate cake with the cream, and then topped it with a dusting of cocoa powder, some melted bittersweet chocolate, and a pecan.
The perfect bite of chocolate cake, with a festive Christmas tree backdrop. It really doesn’t get more comforting than that.
Enjoy!
January 3rd, 2009
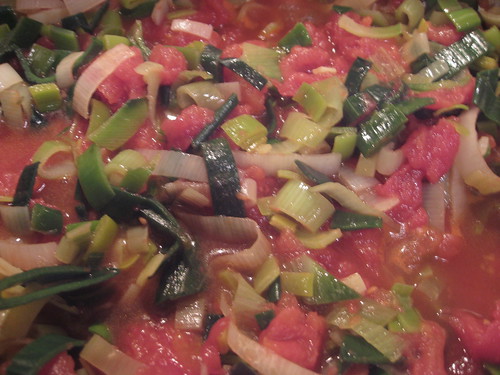
Since I am currently feeling a bit under the weather, (I’ve been fighting a cold/flu-ish type bug this past week), I decided to post about this yummy soup. Although, I’m much too tired at the moment to make it, I sure do wish I had some right about now.
This recipe comes from my friend Alexis’ sweet, adorable mom, Cynde. A couple years ago when I was laid up with a fractured vertebrae from a car accident I was in, Cynde made me food for like a week straight. This was one of the dishes she sent over with Alexis. I was SO grateful for a good home cooked meal, and this soup was incredibly comforting and delicious. I highly recommend it on a cold winter’s day, or whenever you are feeling a little blue or under the weather.
Winter Lentil Soup
Recipe from Cynde O’Connor
INGREDIENTS:
4 leeks, white and light green parts only
1 package frozen collard greens
1 Tspn olive oil
1 28-ounce can whole tomatoes, drained
6 cups water or broth (I use chicken for more flavor)
2 sweet potatoes, peeled, and cut into 1/2-inch dice
1/2 cup brown lentils
1 Tbsp fresh thyme leaves
2 tsp kosher salt
1/4 tsp black pepper
12 fresh basil leaves
1/4 cups grated parmesan cheese (optional)
INSTRUCTIONS:
- Slice each leek in half lengthwise, then slice each half into 1/4″ thick half-moons (about 3 cups).Place in a large bowl of cold water and swish to remove any grit (take my word for it, you’re going to want to do this step). Drain and pat dry.
- Thaw and drain collard greens.
- Heat the oil in a saucepan over medium heat. Add the leeks and cook for 3 minutes.
- Add the tomatoes and cook, breking them up with a spoon, for 5 minutes.
- Add the water (or broth) and bring to a boil.
- Stir in the collard greens, sweet potatoes, lentils, thyme, salt, pepper and basil.
- Simmer until the lentils are tender, about 30 minutes.
- Spoon into bowls, and sprinkle with parmesan cheese.
December 11th, 2008
Next Posts
Previous Posts


